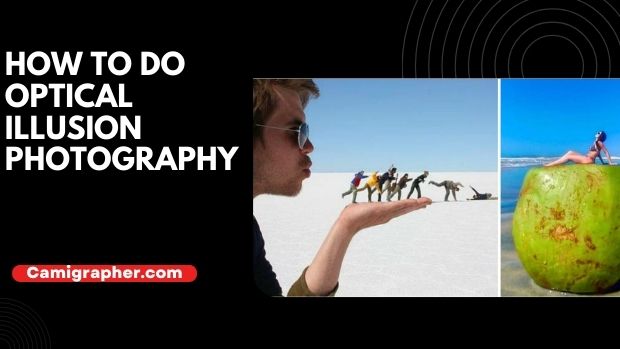
“How To Do Optical illusion Photography”. With the help of optical illusion photography, you can create amazing images that will leave your audience in awe. In this tutorial, we will show you the basics of this type of photography so that you can start creating your own stunning illusions.
Contents
What is an optical illusion?
What are some common optical illusions?
How can you create an optical illusion photograph?
What are some tips for creating successful optical illusion photographs?
An optical illusion is a visual effect that tricks the viewer’s mind into seeing something that is not really there. Some common illusions include the Ponzo illusion, the Ebbinghaus illusion, and the Necker Cube.
To create optical illusion photographs, you first need to identify the illusion you want to exploit. Once you have identified the effect, you need to figure out how to create it in your photograph. There are a few tips for creating successful optical illusion photographs:
- Use strong contrast between your elements. This will help to make your image more visually appealing and help viewers see the illusion more clearly.
- Use low lighting or shadow to create depth and add interest to your image.
- Use color creatively to add contrast and improve the overall visual effect of your image.
- Experiment with perspective to create an immersive experience for viewers.
Types of optical illusions
There are many types of optical illusions, but the most common is called anamorphosis and perspective. Anamorphosis is when an image appears to change its shape when you move your eyes around it. Perspective is when the viewer’s position changes the appearance of an object.
There are also distortion illusions, which change the shape or size of an image. Distortion can be caused by objects in the image being out of proportion, or by using a lens that distorts images.
There are also reflection illusions, which use light to create an appearance that something is different from what is actually there.
And finally, there are shadow illusions, which use light and shadows to create an appearance that something is different from what it actually is.
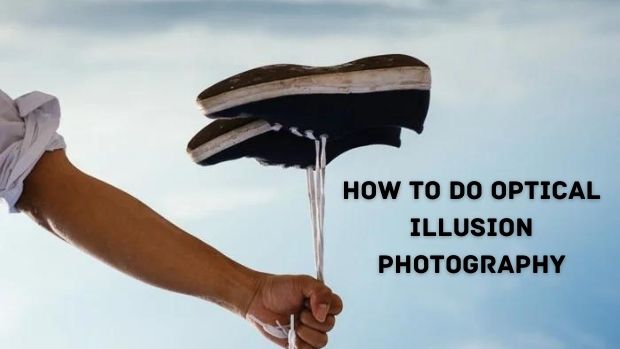
How To Do Optical illusion Photography
Creating an optical illusion is simple with the right tools and a little bit of practice. Here are five tips to get started:
- Use light and shadows to create depth and interest. Shadows can be used to make something seem smaller or larger, while light can be used to make something seem brighter or darker.
- Use objects in your photo to create illusions. For example, using a tilted object can make someone seem taller, and using two different colors of objects together can create an optical illusion known as the “Gorilla Effect”.
- Use creative composition to create interesting effects. Try framing your photo in a way that makes it look like it’s floating on a surface or behind another object.
- Experiment with color and tone to create unique optical illusions. For example, using brightly colored objects in a dark background can create an interesting effect known as the “Coloring Book Effect”, while adding a splash of color to an otherwise monochromatic photo can create the “Rainbow Illusion”.
- Be creative! There are no limits to the number of optical illusions you can create with a little bit of effort and imagination.
 Learn more about.
How To Do A Double Exposure Photography
How To Do A Portrait Photography
How To Do A Fine Art Photography
How To Do Aura Photography
What you will need
Before you start any optical illusion photography, you will need a few things. Obviously, you’ll need a camera and some lenses to take the pictures with, but you also need something to create the illusions. You can use anything from objects on the ground to your own body to create the desired effect. Here are some of the essential items you’ll need:
- An object to use as a background or as part of the illusion
- A camera with a lens that can capture a wide-angle image
- Photoshop or another photo editing software program
- A creativity threshold high enough to push boundaries
- Patience
How to set up your equipment
With the right equipment, you can create some amazing optical illusion photographs. Follow these steps to set up your gear and start creating your own illusions.
- Choose your subject matter wisely. Optical illusion photographs are often based on simple shapes and patterns, so it’s important to find subjects that fit this format. Simple geometric shapes like circles, squares, and triangles work well, while more complex patterns like checkerboards or fractals can be more interesting to look at. If you’re not sure where to start, try looking for images online or in magazines that focus on optical illusion photography.
- Choose your lens. The lens is the key component of any optical illusion photograph, and it’s important to choose one that will deliver the best results. Most lenses designed for photography will work well for this purpose, but if you have a specific lens in mind that you’re hoping to use, make sure to test it out beforehand.
Some lenses are designed specifically for creating optical illusions, while others are more general-purpose lenses that can still produce good results. It’s also possible to purchase special optical illusion lenses online or at specialty stores.
- Set up your light. The light you use to create your optical illusion photographs is important not only for the look of your photographs but also for the accuracy of your results. You’ll need a light that can create a variety of different types of effects, including highlights and shadows.
You can also use artificial lighting to create illusions, but be sure to experiment with different settings to find the ones that work best for your images.
- Choose your camera. Optical illusion photography is often done using digital cameras, but you can also use film cameras if you want to achieve a more traditional look. It’s important to experiment with different settings on your camera to find the ones that produce the best results.
- Shoot and edit your photographs. Once you’ve set up your equipment and fine-tuned your settings, it’s time to shoot some photos! Be sure to experiment with different angles and effects to see what works best for each image. Once you’ve got a few completed images, it’s time to edit them together in order to create the desired effect.
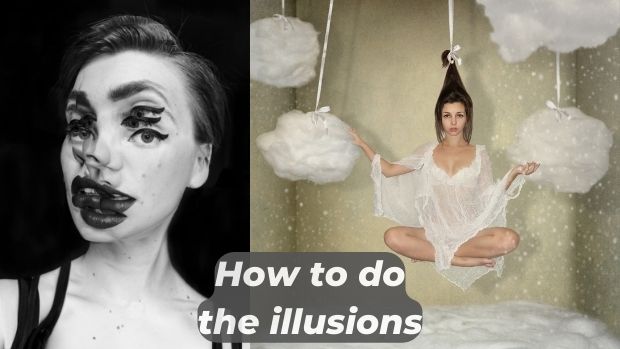
How to do the illusions
Optical illusion photography is a fun and easy way to create beautiful photographs. With a few simple techniques, you can create astonishing images that are completely deceptive. In this article, we will show you how to do the three most common illusions: the Pareidolia Effect, the Fovea Illusion, and the Necker Cube.
The Pareidolia Effect is when an image appears to contain recognizable objects or patterns that are not actually present in the image.
To create this effect, simply focus your camera on a random object and try to capture an interesting detail about it. Then, use Photoshop or another photo editing software to remove any background details and reveal the object in its pure form. This technique is great for creating abstract images that look like they contain hidden messages or symbols.
The Fovea Illusion occurs when our eyes focus on specific areas of an image while ignoring other areas. This can be used to create striking portraits where the subject’s eyes appear to be in different places than their actual head.
To create this effect, first, take a series of photos of your subject with their eyes open and closed. Use Photoshop or another photo editing software to merge the two sets of images together so that the eyes are in the same place in each photo.
The Necker Cube is one of the simplest illusions, and it’s also one of the most common. To create it, take a series of photos of a simple cube that you have hidden in different places around your subject’s environment.
Use Photoshop or another photo editing software to merge the photos together so that the cube is always in the same spot in each photo. This technique is great for creating eerie images that look like they contain secret messages or hidden objects.
Tips for taking good optical illusion photos
If you want to take good optical illusion photos, here are a few tips:
- Shoot in natural light as much as possible. This will help to create a more realistic-looking photo.
- Use smooth backgrounds and avoid harsh lighting. This will help to create the illusion of depth and dimension in your photo.
- Use carefully placed props and objects in your photos to create the desired effect. For example, use a mirror to create an image in reverse or place a bright light nearby to make an image seem brighter than it actually is.
- Be creative! Optical illusion photos can be fun and challenging to create, so have fun with them!
Lighting
One of the most important aspects of any optical illusion photography is the lighting. Not only does it have to be perfect for the image you are trying to create, but it also has to be conducive to creating an eerie or mysterious atmosphere. Here are a few tips on how to do lighting for your optical illusion photos:
- Use a lightbox. This will help you control the light and create more accurate shadows.
- Use a soft light. This will create a more ethereal look and make your subjects look more like ghosts or spirits.
- Use multiple lights. This will create a more dynamic look and help add depth and dimension to your images.
Post-Processing
After you’ve taken your photos, it’s time to start post-processing! In this article, we’ll show you how to do some basic optical illusion photography effects. These effects can be used to create a more interesting and creative look for your photos, or just to make them look cooler.
First, let’s start with the most basic effect – distortion. To do this, open the photo in Photoshop and select the distort tool (it looks like a squished star). Use this tool to distort the image in any way you like. For example, you could stretch it out or make it crooked.
Another basic effect is blurring. To do this, open the photo in Photoshop and use the blur tool (it looks like a seashell). You can use this tool to smooth out the edges of an image or to make it look more blurry overall.
Finally, let’s talk about colors. In optical illusion photography, colors play an important role. To create interesting colors in your photos, use the color balance tool (it looks like a white balance knob) in Photoshop. You can use this tool to adjust the colors of an image so that they look more realistic.
learn more about.
Professional Shooting Modes In Panasonic Cameras
Professional Shooting Modes In Sony Cameras
Professional Shooting Modes In Nikon Cameras
Professional Shooting Modes In Canon Cameras
Cool Photography Tricks With Phone
Gimbal Video Shoot Tips And Tricks
Drone Photo Shoot Tips And Tricks
Close-Up Photoshoot Ideas
DIY Boudoir Photography Ideas
How To Do Portrait Night Photography
Horse Photography Tips And Tricks
Sony Camera Settings For DIY Boudoir Photography
Conclusion
Many people enjoy creating optical illusion photography, as it can be a very creative way to take your photography to the next level. In this article, we will discuss tips on creating optical illusion photographs that will amaze and delight your viewers.
By following these simple steps, you will have no trouble creating stunning images that will leave them wondering how you did it!
Thanks for reading! Stay tuned for new updates. camigrapher.com